Configure Data Access
Data access sets determine the data of the analytic object that can be accessed.
Access requirements
Custom profiles with one of the following capability sets:
- Permission Management (Write, Detailed)
- Security (Write, Detailed)
-
User Management (Write, Detailed)
Reach out to your administrator for access.
Note: If your tenant has the validate full data access for permissions feature toggle enabled, you must also have the following access requirements:
- Access to all data such as the Super Admin permission
Overview
After defining the population access, the final step in configuring data security is to define the data access sets for each analytic object that you've added. When configuring data access sets, you'll be determining the level of access that users have to properties and property values for the analytic object. You can also grant access to properties of subjects that are referenced by the analytic object that you selected. You can find these configurations listed under References. Subject references can have many layers which you can simply drill into. For more information, see Data security and subject references.
You can also view the permissions that use each data access set. These permissions are listed in the Dependencies tab.
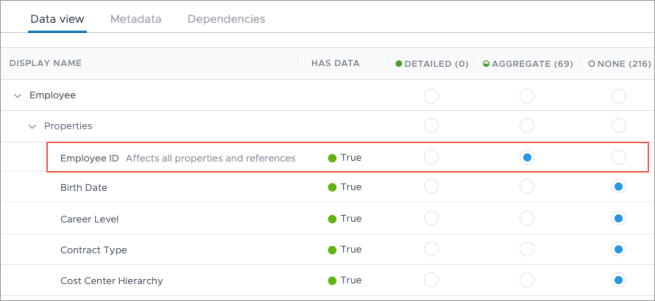
For subject and event properties, you can set one of three access levels: Detailed, Aggregate, and None. There are no access levels for overlay properties, you simply turn them on or off. Data access is not applicable to sources.
You can create data access sets in a project or as non-versioned security artifacts. For more information, see Use Projects for Version Control and Non-Versioned Security.
How properties affect available data
In the solution, properties are used to calculate content objects such as metrics, dimensions, concepts, and calculated properties. Properties also appear as attributes that users can use to filter and group by. Attribute values for individual subjects and events can also be seen in Detailed View.
When setting the access levels, ask yourself:
- Do I want users to have access to the metrics, dimensions, concepts, and calculated properties that rely on this property? Yes or no?
- If the answer is no, then set the access level to None.
- If the answer is yes, move on to question 2.
- Do I want users to see attribute values for individual subjects or events in the Detailed View visual? Yes or no?
- If the answer is no, set access to Aggregate.
- If the answer is yes, set access to Detailed.
Note:
-
Even if aggregate access is configured for a property, users can still infer sensitive values, such as compensation, from aggregate values using math and filters. To prevent this, we recommend restricting data access by changing the access level from Aggregate to None. To hide sensitive data while keeping metrics visible, map calculation concept nodes to the Unknown member and set attribute access to Aggregate. This prevents data inference without hiding the associated metrics. For more information, see Hide dimension values while keeping metrics visible.
- The access level only controls whether a user can see the property value in Detailed View.
Example: Access levels for a property
The following table describes what data users can see if different access levels are configured for the Employee property: Birth Date.
| Access level | What users can see |
|---|---|
| Detailed |
|
| Aggregate |
|
| None | No data from any metrics, dimensions, concepts, or calculated properties that use the Birth Date property. |
Property review workflow
To help you configure data access sets, you'll find information in the Info panel that details where a property is used and how it impacts the availability of metrics, dimensions, concepts, and calculated properties.
- To open the Info panel, click the Info button
 in the upper-corner of the room or select a metric that you're interested in.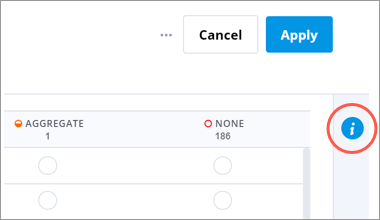
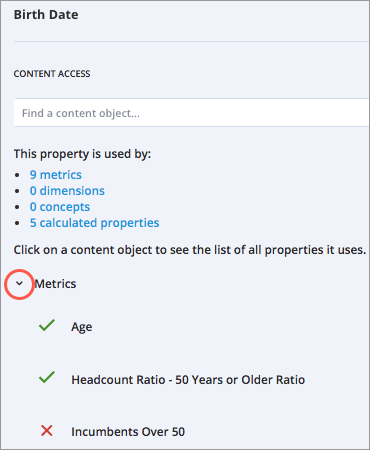
- In the Info panel, expand the Content object lists to see if where the property is used and whether users have access to these items based on the current access levels.
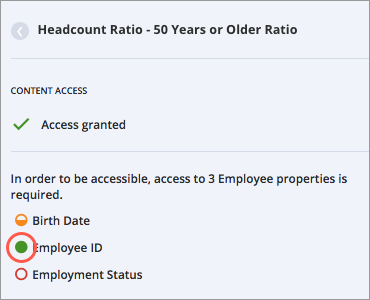
- Select an item to see what other properties you'll need to grant access to in order for the item to appear in the solution. The icons to the left of the property indicate its current access level setting.
Data security and subject references
When defining data access sets, you have the opportunity of granting access to properties of subjects that are referenced by the analytic object that you selected. This means that the two subjects are connected in the data. References allow you to give users access to additional properties that they can use in filters and group bys when analyzing the analytic object. For example, each employee has a direct manager and when you define the data access set for the Employee subject, you can also define the access to properties for the Direct Manager subject reference.
If you give detailed access to all properties for the Direct Manager subject reference, users will be able to use these properties to analyze Employee based metrics. For example, when analyzing the Headcount metric, users can group employees by their direct manager's age.
Subject references can have multiple layers. For example, through the Direct Manager subject reference, you can then grant access to the properties of the Applicant subject. The number of subject references of an analytic object depends on the availability of data and data structure that you've onboarded.
Create a data access set
Create data access sets on the fly when creating a permission or ahead of time in the Data Access Sets room.
Note: If the More Security Around Data Access Management feature is enabled, you will need access to all data, such as the Super Admin permission, to perform this task. For more information, see More security around data access management.
Step One: Create data access set
To create data access sets on the fly when creating a permission:
-
Click in the Data access column.

Tip: If you want to reuse the data access sets that you create on the fly in other permissions, click Save after you've set the access levels for each property.
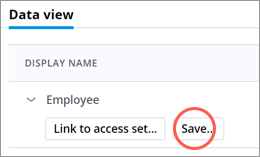
You can manage your saved data access sets in the Data Access Sets room.
To create data access sets ahead of time in the Data Access Sets room:
- In a project, on the navigation bar, click Security > Data Access Sets.
- Click Add Data Access Set.
- In the New data access set pane, select the analytic object you want to create a data access set for and then click Next.
- Type a display name for the data access set and then click Create.
Step Two: Set the data access levels for each property
- In a data access set, click the Data Access column.
- In Configure data access for, do one of the following:
- Set the access level to detailed, aggregate, or none for each subject property.
- Set whether each overlay property is on or off.
Note:
- Use the header rows to quickly set the access level for all nested items.
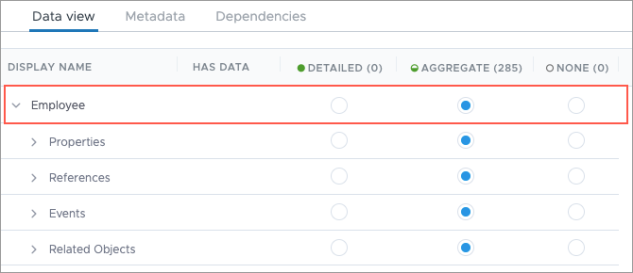
- Subject IDs, listed at the top of the Properties list, have an affect on the rest of the items listed. If you want to configure access to the other properties and references, you must grant access to the ID first. No other item can have a greater access level than the ID property. For example, if you set the access level for the Employee ID property to Aggregate, you cannot set the access level for the Birth Date property to Detailed.